Introduction
Hello friends! Most of us might have always wondered about how can automated scripts talk with web applications. It is a cool thing to do, isn’t it? I would say, of course. It is not the easiest thing to do but I guarantee not the hardest as well. Starting with this tutorial, we are going to see step by step and slowly how to test a web application with the help of automation using selenium.
In this tutorial, we will start with all the set up and installation part. This blog will have below topics which we will be understanding in detail with the help of screenshots (wherever necessary):
- What is Selenium ?
- Install JDK (Java Development Kit)
- Install Eclipse IDE
- Install Selenium WebDriver
- Configuration of Selenium WebDriver and Eclipse IDE
What is Selenium ?
Selenium is not a single application, but rather a group of software applications. The main objective of this open source automated testing framework, which Jason Huggins created in 2004, was to validate online applications across a range of platforms and browsers. Programming languages supported by Selenium include Java, Python, C#, and others.
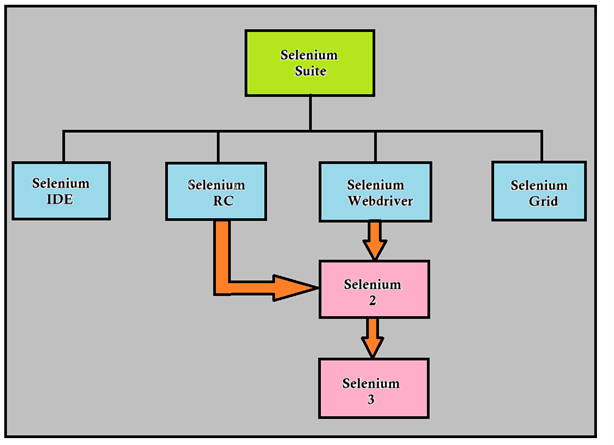
As mentioned above, it is a suite of different software, the tools present are:
- Selenium Integrated Development Environment (IDE)
- Selenium Remote Control (RC)
- Selenium Webdriver
- Selenium Grid
Selenium RC when introduced was called as Selenium 1. Later on, Selenium RC (i.e. Selenium 1) and Selenium Webdriver were merged to form Selenium 2. And so on Selenium 3 was found.
NOTE: Latest version of Selenium is Selenium 4 Beta 1. But as it is a beta version, we can expect the stable version soon.
Useful Links – Java Selenium Course | Selenium Tutorial For Beginners
Install JDK (Java Development Kit) –
This tutorial will teach us how to use Java as a programming language in conjunction with Selenium. The Java Software Development Kit, or JDK, must be downloaded and installed before we can begin using Java. Java Runtime Environment (JRE) and Java Development Kit (JDK) are required for Java programs to run on a computer.
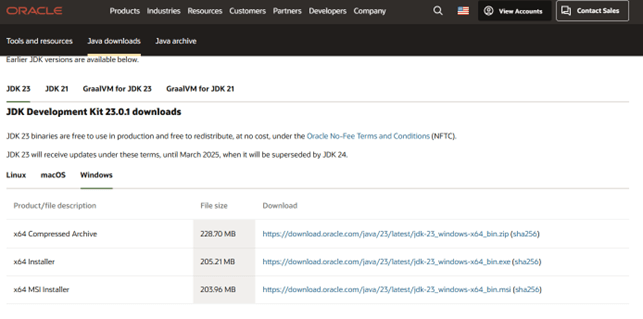
Please click here to download java on your machine. The java can be downloaded from official website of ORACLE. Here, we will get the latest versions of JDK for different operating systems. (If you are on windows machine, please download MSI Installer where MSI is Microsoft Installer).
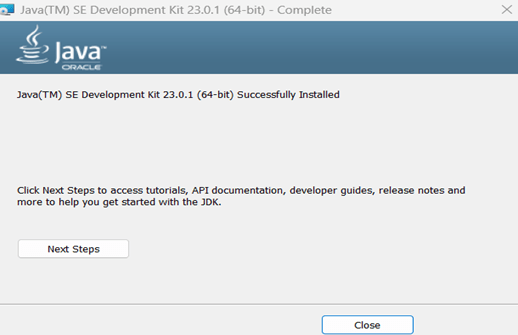
Once, the download is finished, we need to install java. We can see below popup once the installation is completed.
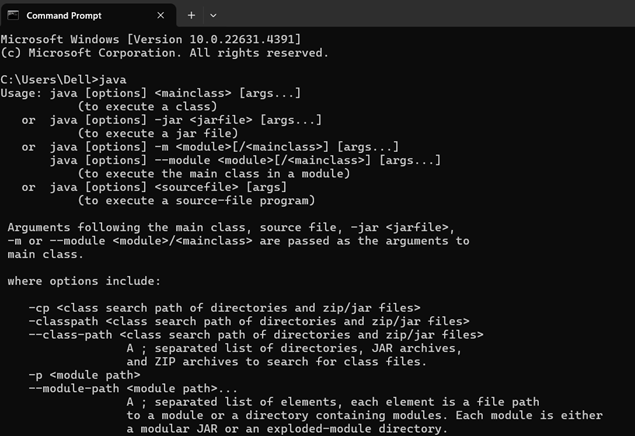
Once the installation is complete, open command prompt and type ‘java’. If the below screen is visible that means, java is installed correctly.
Install Eclipse IDE –
Eclipse IDE is an editor which we will be going to use to write our selenium scripts with Java. Please click here to download the latest version of Eclipse IDE.
The link will give you the following where we can download the latest version available.
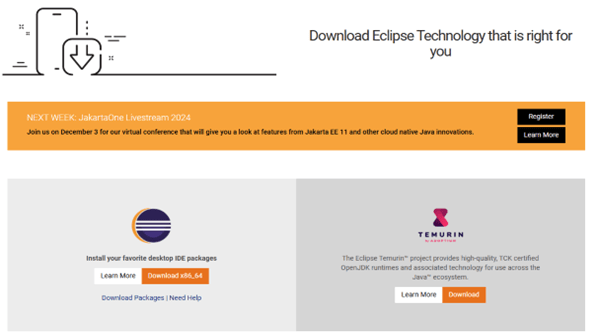
There will be an .exe file named ‘eclipse-inst-jre-win64.exe’ should get downloaded.

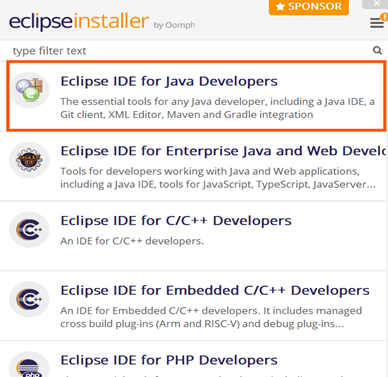
Now, we can start installing the Eclipse. Out of the many menus available, we need to choose Eclipse IDE for Java Developers.
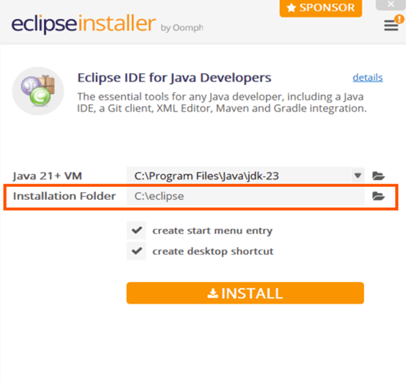
We will get a new window where we can change the installation folder of eclipse. We can choose as per out choice but it is advisable that we should install it under C drive.
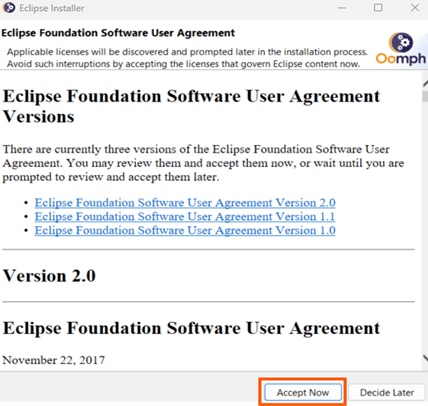
The final step before eclipse gets installed completely is user license agreement. We need to hot the ‘Accept Now’ button to proceed to finish the installation.
Once the installation gets successful, a new window will appear where we can see the ‘Launch’ button
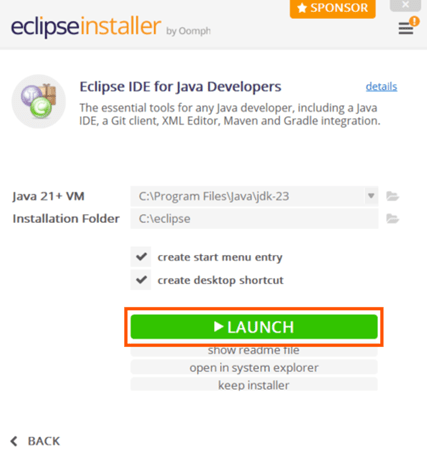
The last step to launch the Eclipse is hitting the ‘Launch’ button. Once hit, the eclipse IDE will launch for you.
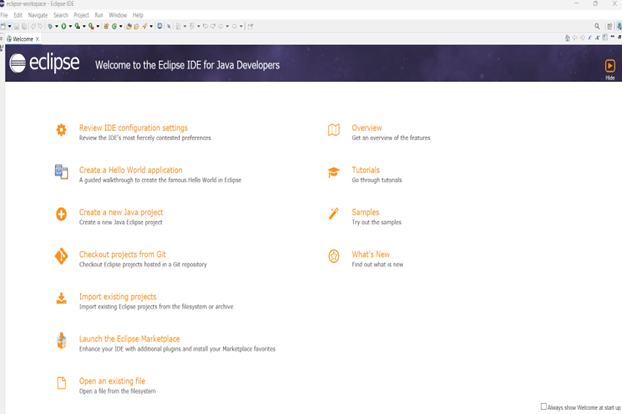
The landing page or homepage of eclipse when you launch it for the first time looks like –
Install Selenium WebDriver –
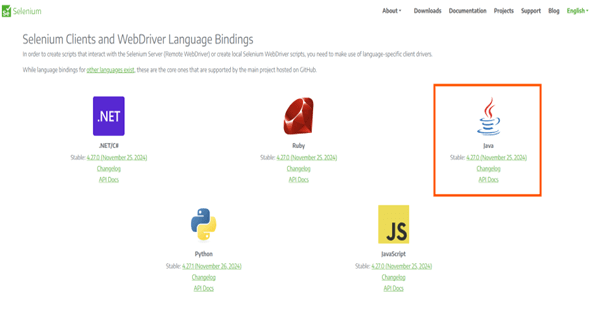
We can click here and download Selenium Webdriver for Java Client Driver. As we are going with Java as a programming language in this tutorial, we need to download the one for java only.
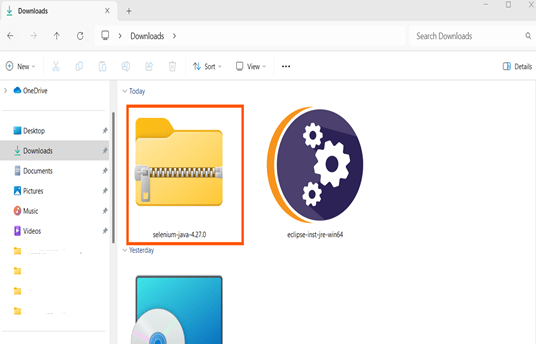
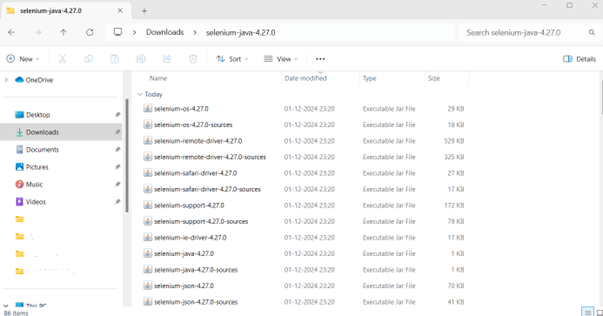
The downloaded file will appear in Download section in a zip format. The file contains the essential JAR files which we will use to configure Selenium Webdriver with Eclipse IDE.
When the zip file is unzipped i.e. all the file present inside that zip are extracted, we will see the list of various JAR file which we will be using while configuring Selenium Webdriver and Eclipse IDE.
Useful Links – Java Selenium Course | Selenium Tutorial For Beginners
Configuration of Selenium Webdriver and Eclipse IDE –
To configure webdriver and eclipse, we will create a Java project first. Once the project is created, then we will load all the necessary JAR files so that we will begin a position to create Selenium test scripts.
- Launch Eclipse
- Create a new JAVA project
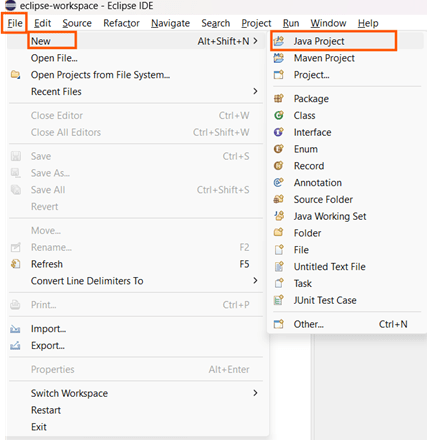
As we are using eclipse for the first time, we will see direct option to create new JAVA project. If we don’t get to see the below screen, we can always navigate to File >> New >> Java Project
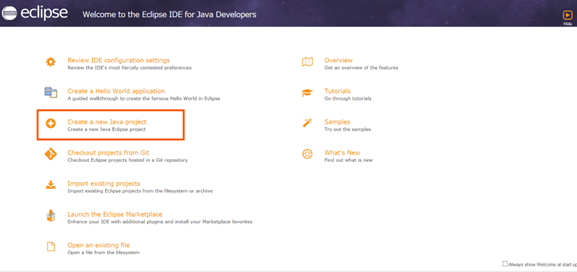
OR we can traverse through the File menu as
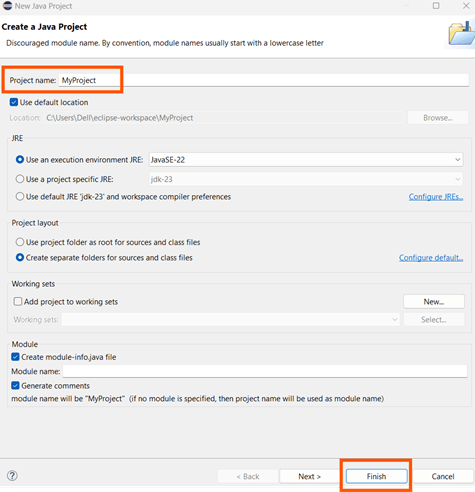
We can give the project name as ‘MyProject’ and for now, leave rest of the fields as they are.
When the project creation is completed, we can see the below directories associated inside the project.
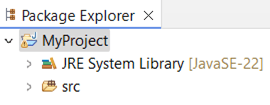
We would like to create / add a new Package as we cannot directly create a class file in a project. This package will be added inside src folder. So, just right click the src folder and then New >> Package.
We will give this package a name as ‘firstPackage’ as this is our first package in the current project.
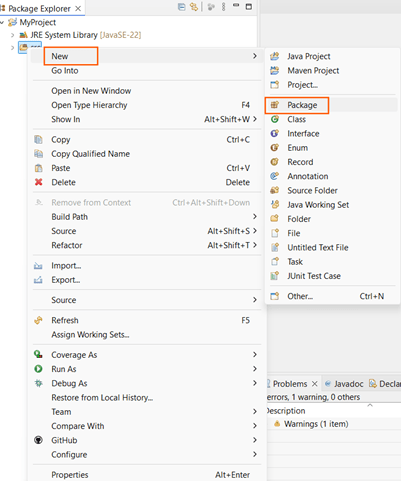
NOTE: If we try to add a class directly in src folder, we will get the error as ‘A package name must be specified for a module.’ and we won’t be allowed to create a class file there.
Now, we will add a new class file inside the project. For that we need to perform right click operation on the project and then New >> Class.
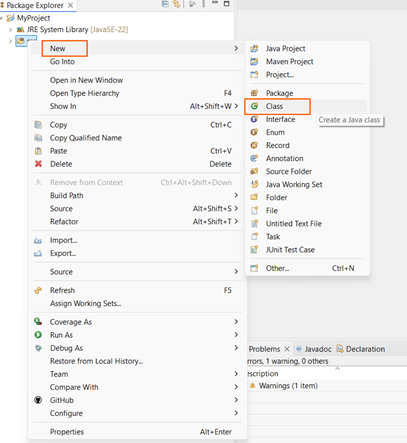
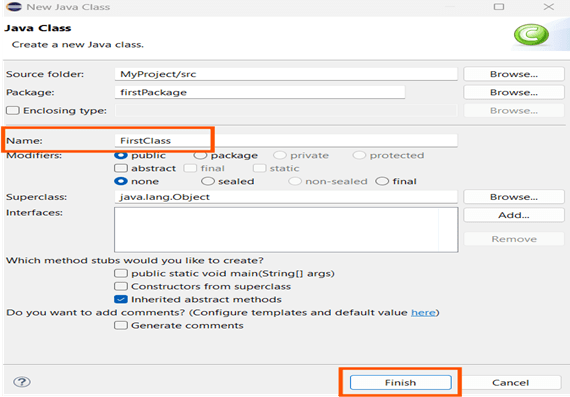
We can choose to give any appropriate name to the new class being added. We will use the name ‘FirstClass’ as this is our first class in this project.
The directories will look like as follows after creating a class:
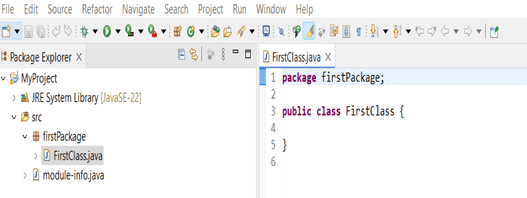
Now, we are all ready to set the selenium webdriver libraries into java build path.
The libraries are always added project level, so we need to right click on MyProject and select the last option Properties.
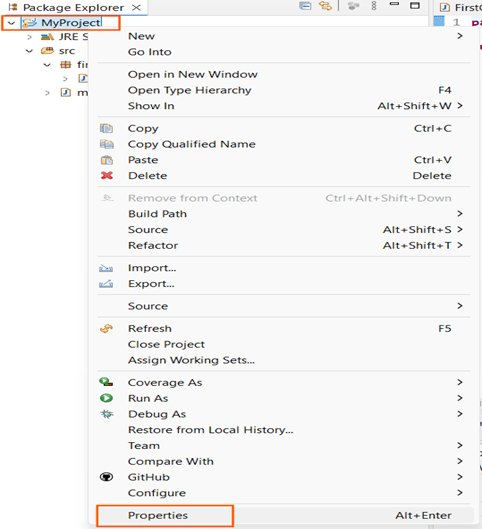
On Properties popup window, click on ‘Java Build Path’ in the left list of menus. And then follow the steps:
Java Build Path >> Libraries >> Add External JARs…
When ‘Add External JARs…’ button is clicked, we need to move to the folder where all the JARs are stored after downloading them. Once added, we can hit ‘Apply and Close’ button.
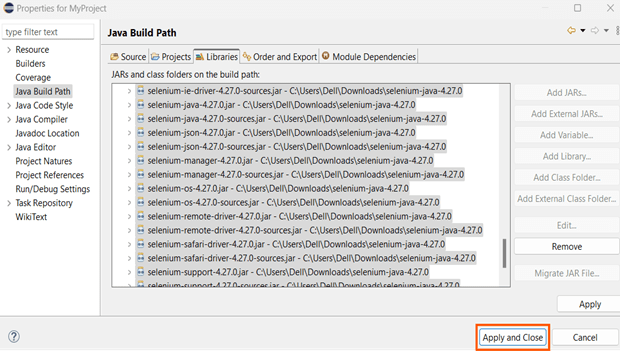
When all the JARs are added, our project directory will look something like this –
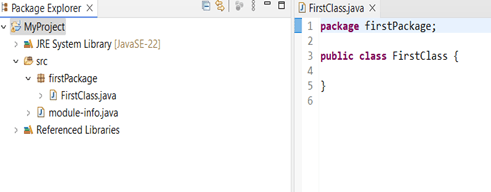
All the JARs can be seen stored / seen inside the project inside ‘Reference Libraries’.
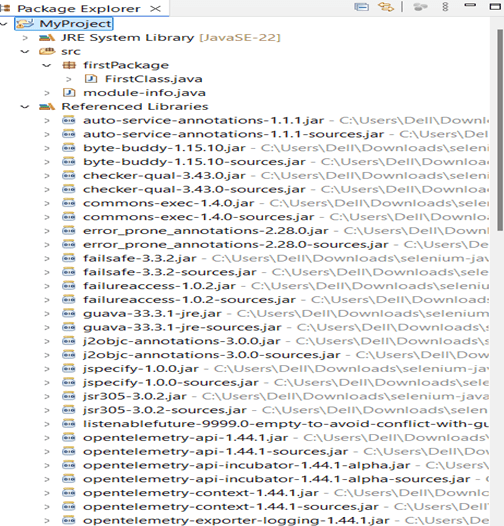
And finally, this is how we saw how to import selenium libraries in our project and configure them with Eclipse IDE.
Conclusion
To sum up, installing Java with Selenium is a crucial phase for anyone intending to successfully automate web applications. You have successfully set up your environment by following the detailed instructions, making sure that Selenium and Java are installed and configured correctly. With this configuration, you may start creating and executing automation scripts, which facilitates quicker testing and more effective development procedures.
While this is only the beginning, keep in mind that learning Java and Selenium offers up a world of possibilities for testing and automation. To enhance your workflow, keep learning about Selenium’s many features, try out other tools, and hone your automation abilities. Have fun with your coding!

