Last Updated on September 11, 2024 by Techcanvass Academy
SQL Tutorial for Beginners
This is the second part of SQL Tutorial for beginners. In this first part of this SQL tutorial for beginners, you learnt about the basics of a database system and SQL.
In this part, we are going to learn about CREATE TABLE & INSERT/DELETE commands. These commands are SQL commands and are used to interact with the database.
We are going to use W3 School Online SQL editor in this tutorial, so keep it open in another tab in your browser.
CREATE TABLE COMMAND
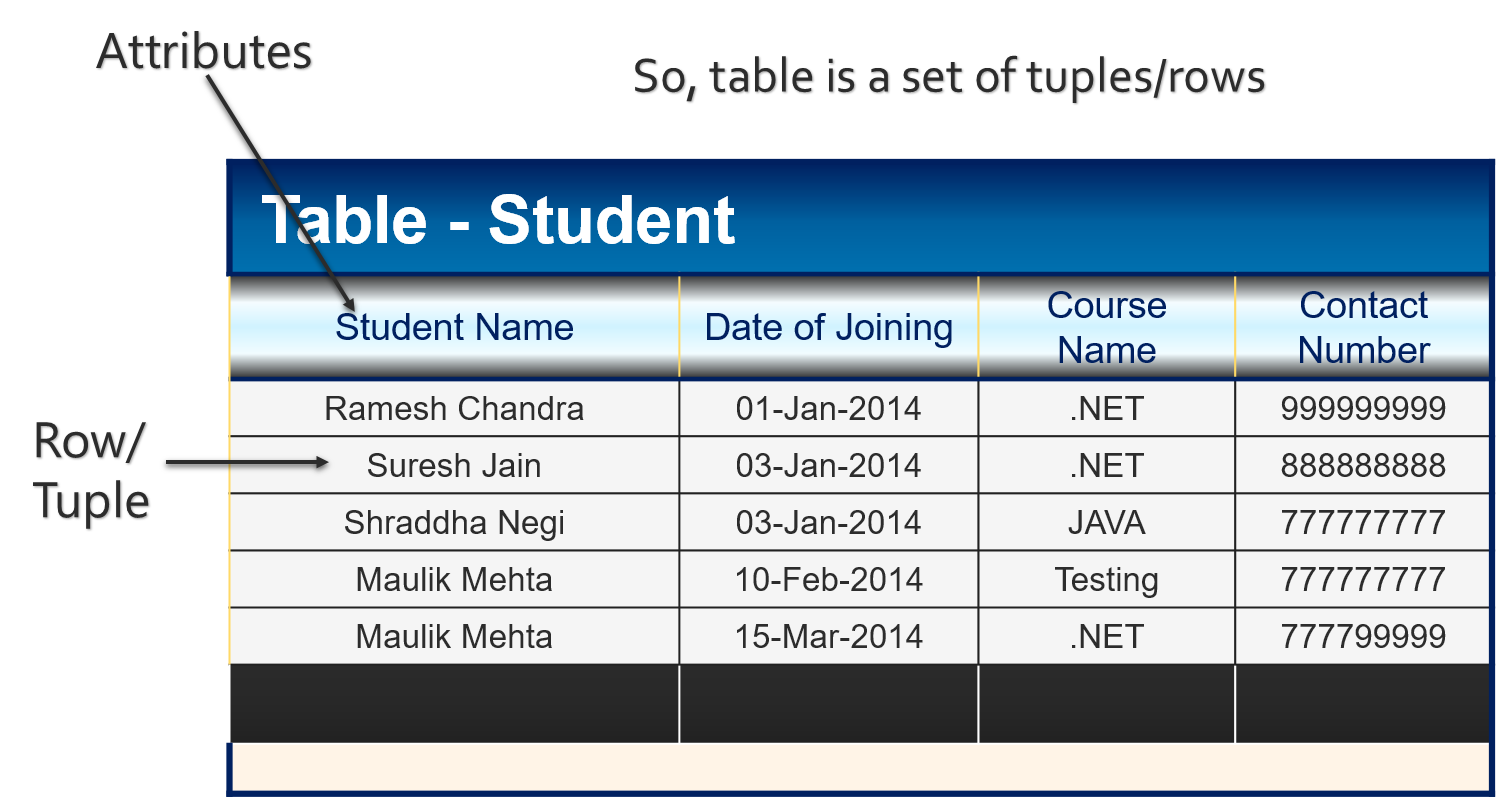
Create table command is used to create a table. We have discussed STUDENTS table in the part I of this tutorial. Let’s re-produce that table for our reference.

To create this table using SQL, we use CREATE TABLE command. The Syntax of this command is as follows:
CREATE TABLE <<TABLE_NAME>>
(
Column_name1 datatype,
Column_name2 datatype,
….
)
The datatype is the type of data, which will be stored in the column like Text, number or date etc. So to create the STUDENTS table, we can write the following CREATE TABLE command:
CREATE TABLE STUDENTS
(
student_name varchar2(100),
date_of_joining date,
course_name varchar2(100),
contact_number number(11)
)
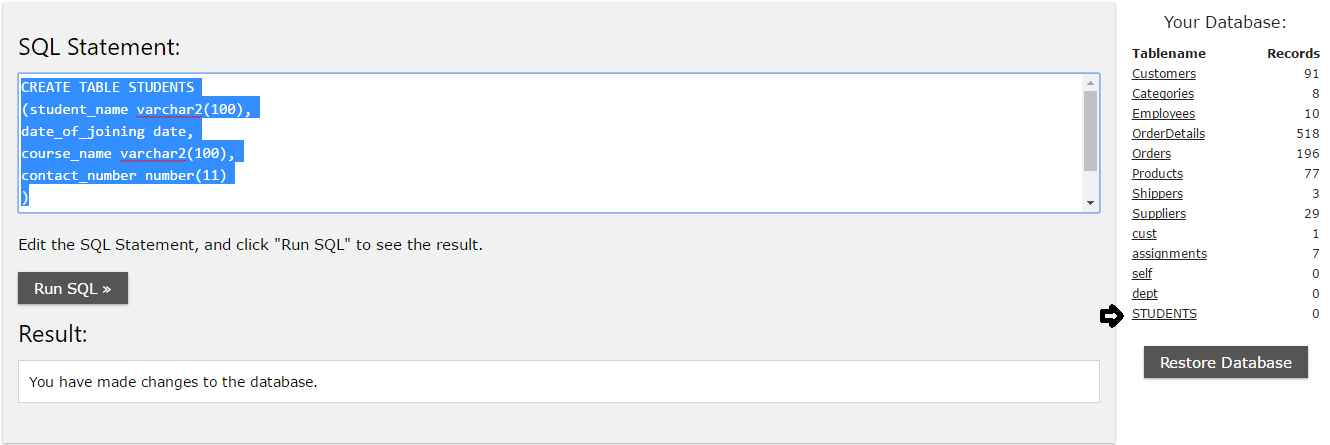
You can type the above command in the SQL statement box and click on “Run SQL” button. You can see that a new entry will be created at the bottom “Your database” section on the right, as indicated in the image below:

One important aspect, you must remember, the table & column names must be a single word. We cannot use “Student name” as column name and that’s the reason, we have used “student_name” as column name.
Note: All Database systems will not allow duplicate names for tables and other database components.
Practice Exercises
You can see a lot of tables in the right side section of the W3 SQL editor. Click on them and try and create tables with similar column names but different table names.
INSERT Command
INSERT Command is used to put data into the table. It’s a simple command and the syntax is as shown below:
INSERT INTO <<table_name>> (column names….) values (….);
To understand it well, let’s again refer to our STUDENTS table above. Let’s try and put the first row into the table STUDENTS, which we have created in the previous section. Let’s say that we have to put the first row in the table STUDENTS, the INSERT command will be written as follows:
INSERT INTO STUDENTS VALUES (“Ramesh Chandra”, “01-Jan-2014”, “.NET”, 999999999);
Please note that we have used ” ” for text and date values but we have not used ” ” for contact number, which is a number column.
Practice Exercises
Refer to STUDENTS table and INSERT the remaining rows in the STUDENTS table.
DELETE Command
DELETE command is used to delete the rows from the tables. It’s again a simple command and its syntax is as follows:
DELETE FROM <<table_name>> condition;
It’s important to note that if we don’t use the condition, the DELETE command will delete all the rows from the table. We will see how to specify the condition in the last part of this tutorial.
What’s next: Part-III of this SQL tutorial, where we will discuss SELECT statement.
We are coming up with a more comprehensive tutorial for learning Business Analysis skills . That tutorial will provide steps to learn the business analyst skills with specific resources including videos and tutorials.
You may also like to look at our other tutorials and videos.

Finally, SQL is an important skill for Business Analysts specially if you are looking to become a business analyst.
Techcanvass has multiple levels of training program for business analysts.


